ACFでテキスト入力のみで、表示非表示を切り替えできるテーブルを作成
ACFでは、アドオン等でテーブルを作成することができます。今回は、ACFのテキストの入力のみでテーブルの表示非表示する方法を紹介します。

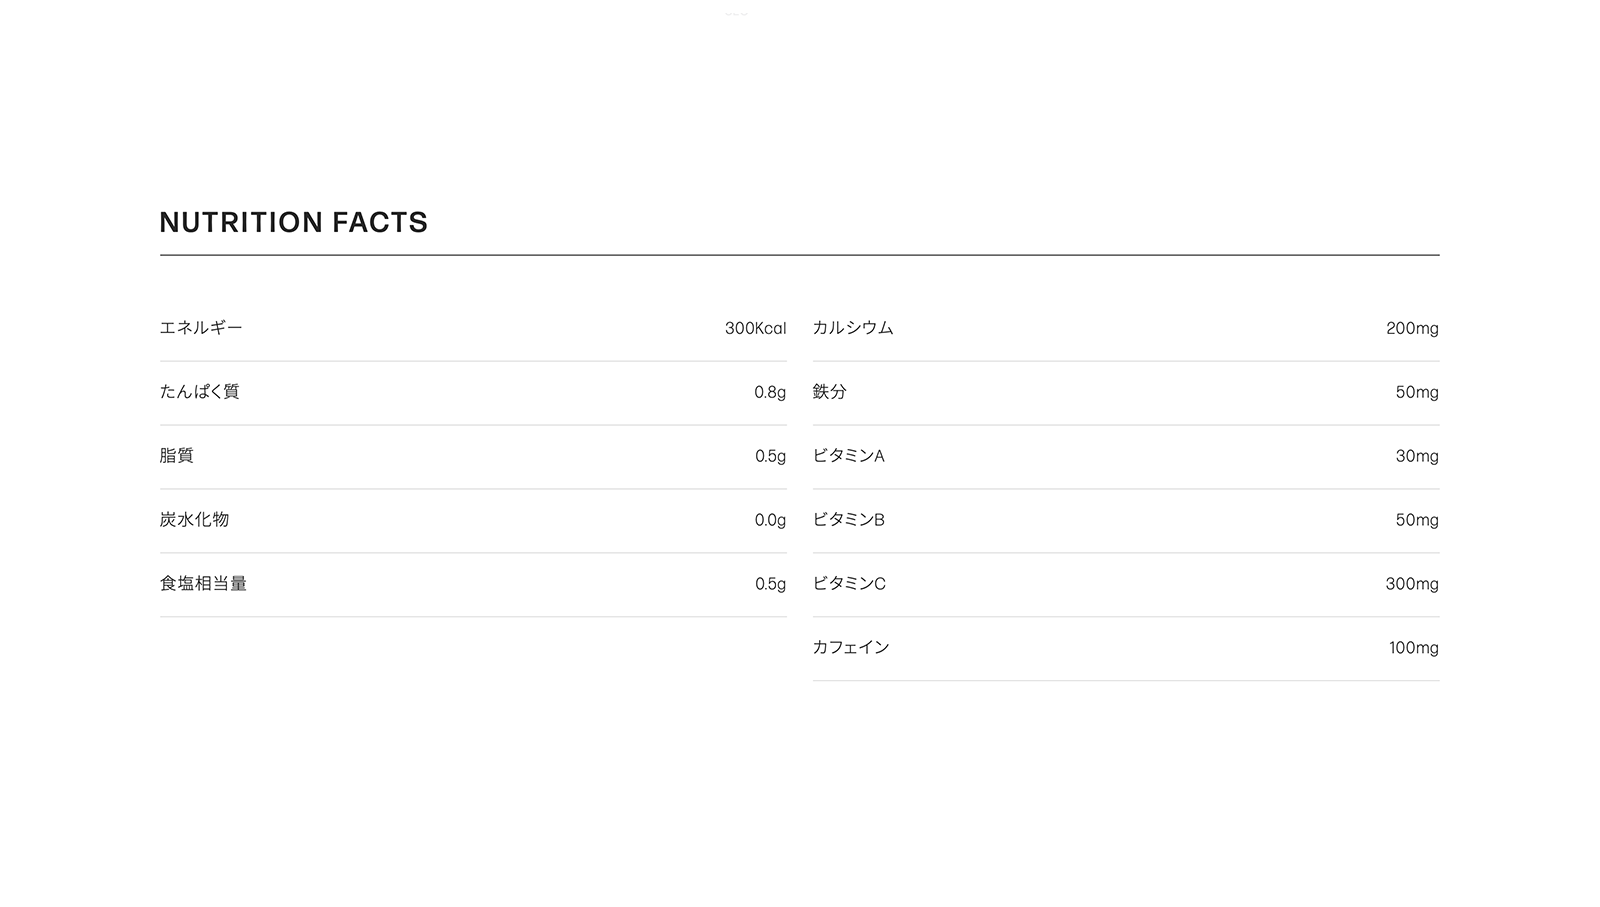
今回のDEMOは、栄養成分表を作成しました。
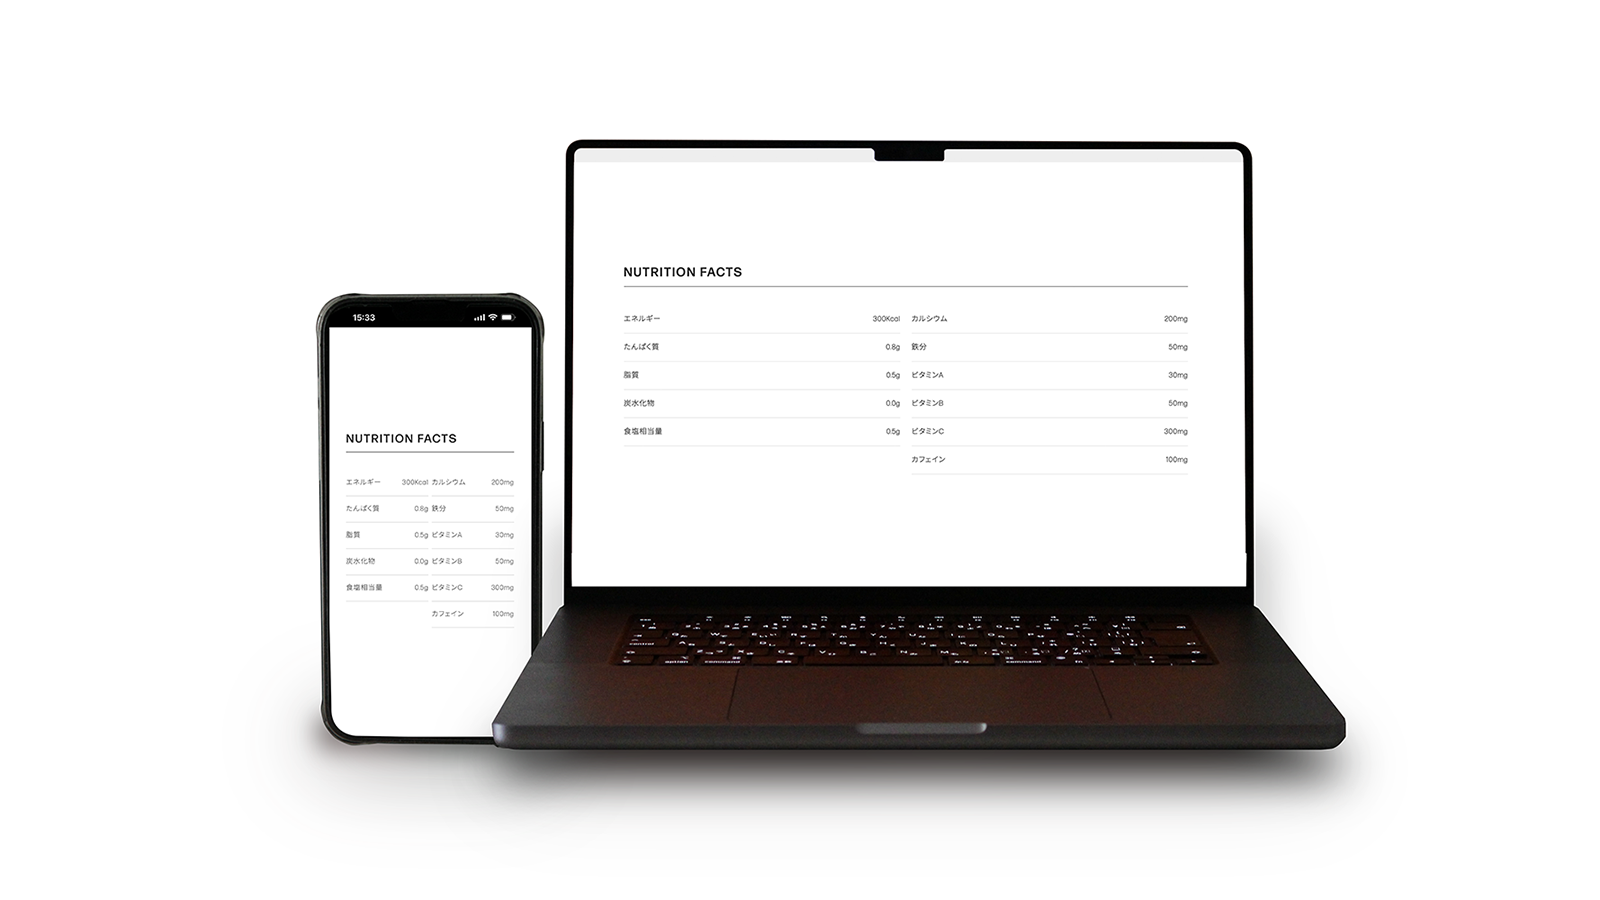
実際13項目の入力項目がありますが、11項目のみ表示しています。左カラムの必須5項目は、常に表示するようになっています。右カラムの残り8項目は、テキストを入力したら表示するようになっていて、6項目が表示されています。今回は、食物繊維、ビタミンDの2項目を非表示にしています。
ACF設定
フィールドタイプはテキストです。13個のフィールドを設定しています。
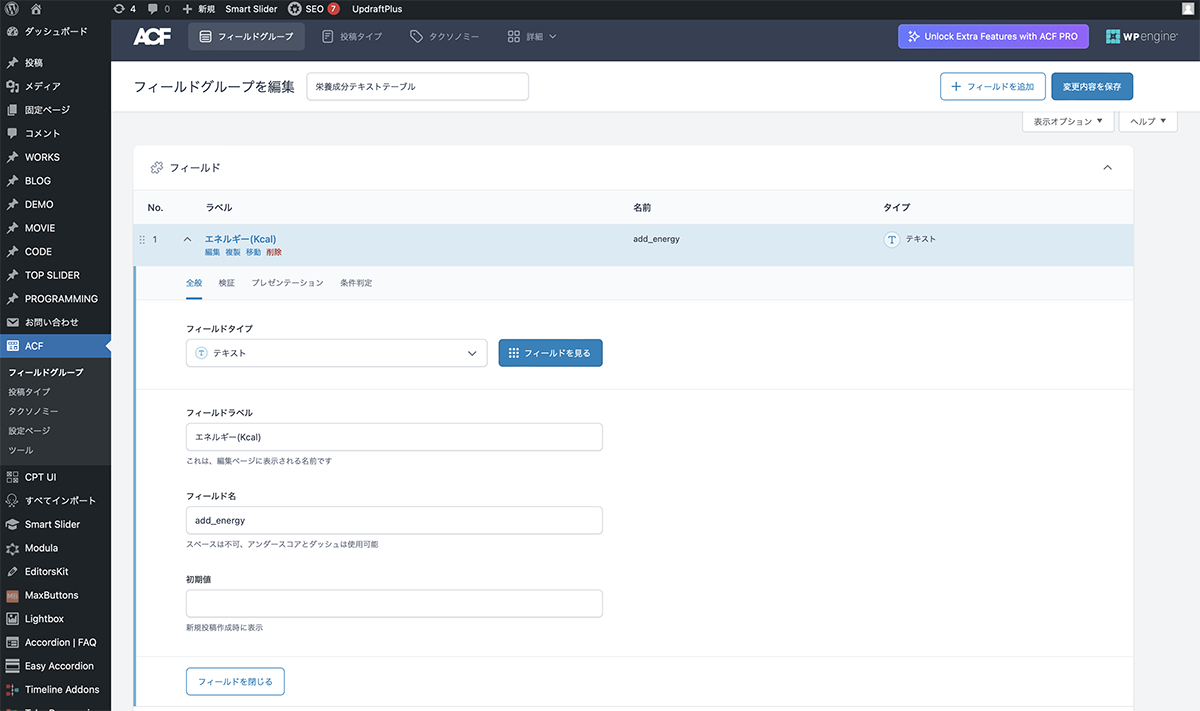
フィールドタイプはテキスト
| 設定項目 | 設定値 |
|---|---|
| フィールドタイプ | テキスト |
| フィールドラベル | エネルギー |
| フィールド名 | add_energy |
| 初期値 | 空欄 |
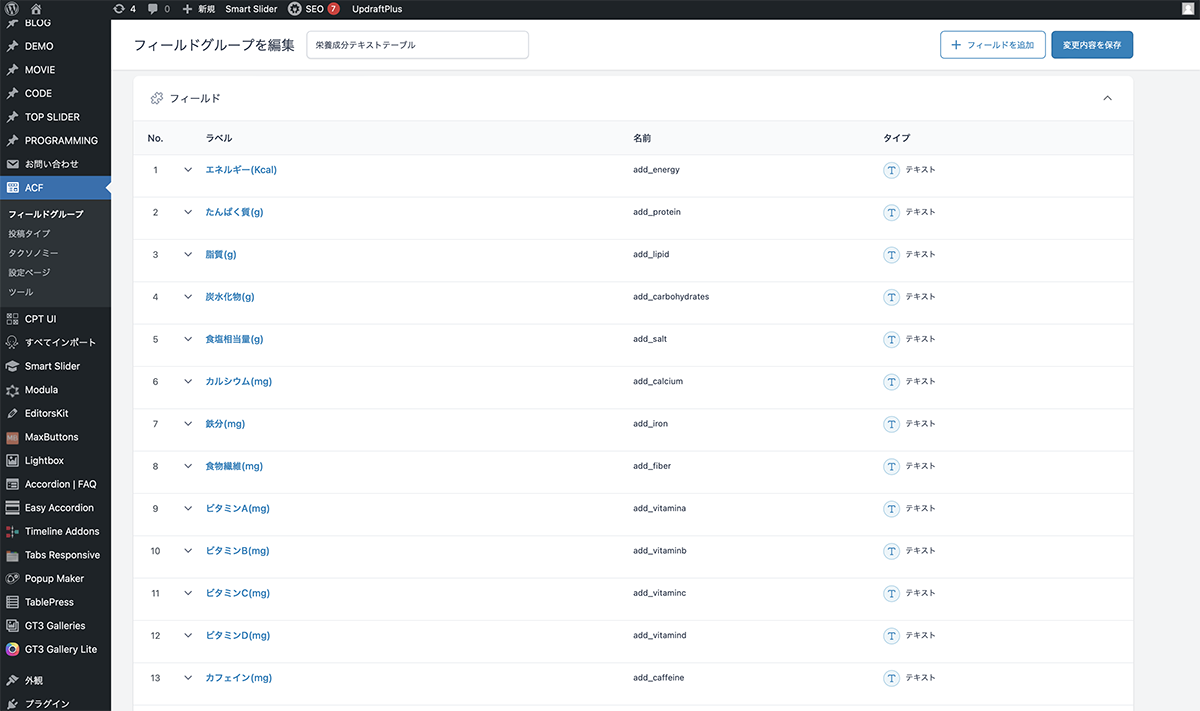
13個のフィールドを設定
コード
シングルページのループ内に下記のコードを入力します。
<div class="texttable">
	<div class="texttable_heading">NUTRITION FACTS</div>
	<div class="texttable_wrapper">
		<table>
    		<tr>
      			<td>エネルギー</td>
      			<td><?php the_field('add_energy'); ?>Kcal</td>
    		</tr>
    		<tr>
      			<td>たんぱく質</td>
      			<td><?php the_field('add_protein'); ?>g</td>
    		</tr>
    		<tr>
      			<td>脂質</td>
      			<td><?php the_field('add_lipid'); ?>g</td>
    		</tr>
    		<tr>
      			<td>炭水化物</td>
      			<td><?php the_field('add_carbohydrates'); ?>g</td>
    		</tr>
    		<tr>
      			<td>食塩相当量</td>
      			<td><?php the_field('add_salt'); ?>g</td>
    		</tr>
  		</table>
		<table>
			<?php if (get_field('add_calcium')): ?>
    			<tr>
      				<td>カルシウム</td>
      				<td><?php the_field('add_calcium'); ?>mg</td>
    			</tr>
			<?php endif; ?>
			<?php if (get_field('add_iron')): ?>
    			<tr>
      				<td>鉄分</td>
      				<td><?php the_field('add_iron'); ?>mg</td>
    			</tr>
			<?php endif; ?>
			<?php if (get_field('add_fiber')): ?>
    			<tr>
      				<td>食物繊維</td>
      				<td><?php the_field('add_fiber'); ?>mg</td>
    			</tr>
			<?php endif; ?>
			<?php if (get_field('add_vitamina')): ?>
    			<tr>
      				<td>ビタミンA</td>
      				<td><?php the_field('add_vitamina'); ?>mg</td>
    			</tr>
			<?php endif; ?>
			<?php if (get_field('add_vitaminb')): ?>
    			<tr>
      				<td>ビタミンB</td>
      				<td><?php the_field('add_vitaminb'); ?>mg</td>
    			</tr>
			<?php endif; ?>
			<?php if (get_field('add_vitaminc')): ?>
    			<tr>
      				<td>ビタミンC</td>
      				<td><?php the_field('add_vitaminc'); ?>mg</td>
    			</tr>
			<?php endif; ?>
			<?php if (get_field('add_vitamind')): ?>
    			<tr>
      				<td>ビタミンD</td>
      				<td><?php the_field('add_vitamind'); ?>mg</td>
    			</tr>
			<?php endif; ?>
			<?php if (get_field('add_caffeine')): ?>
    			<tr>
      				<td>カフェイン</td>
      				<td><?php the_field('add_caffeine'); ?>mg</td>
    			</tr>
			<?php endif; ?>
  		</table>
	</div>
</div>
CSSでスタイルの設定をします。
.texttable{
	margin: auto;
	width: 80%;
	height: auto;
	max-width: 1800px;
}

.texttable .texttable_heading{
	margin: auto;
	margin-bottom: 1.5em;
	border-bottom: solid 1px #272727;
	font-size: 1.7em;
	line-height: 1.2;
	font-weight: 500;
	letter-spacing: 0.1em;
	padding-bottom: 0.5em;
}

.texttable_wrapper{
	display: flex;
	-webkit-box-align: start;
	-ms-flex-align: start;
	align-items: flex-start;
	justify-content: space-between;
}

.texttable_wrapper table,tr,td {
    border-collapse:  collapse;
    border-spacing: 0;
	padding: 0;
	margin: 0;
}

.texttable_wrapper table{
	width: 48%;
}

.texttable_wrapper  tr :last-child {
	text-align: right;
}

.texttable_wrapper  td{
	border-bottom: solid 1px #ddd;
	padding: 1em 0;
}
設置
作成したフィールドグループが表示されるので、テキストボックスに数値を入力します。食物繊維、ビタミンCを非表示にするため空欄にします。
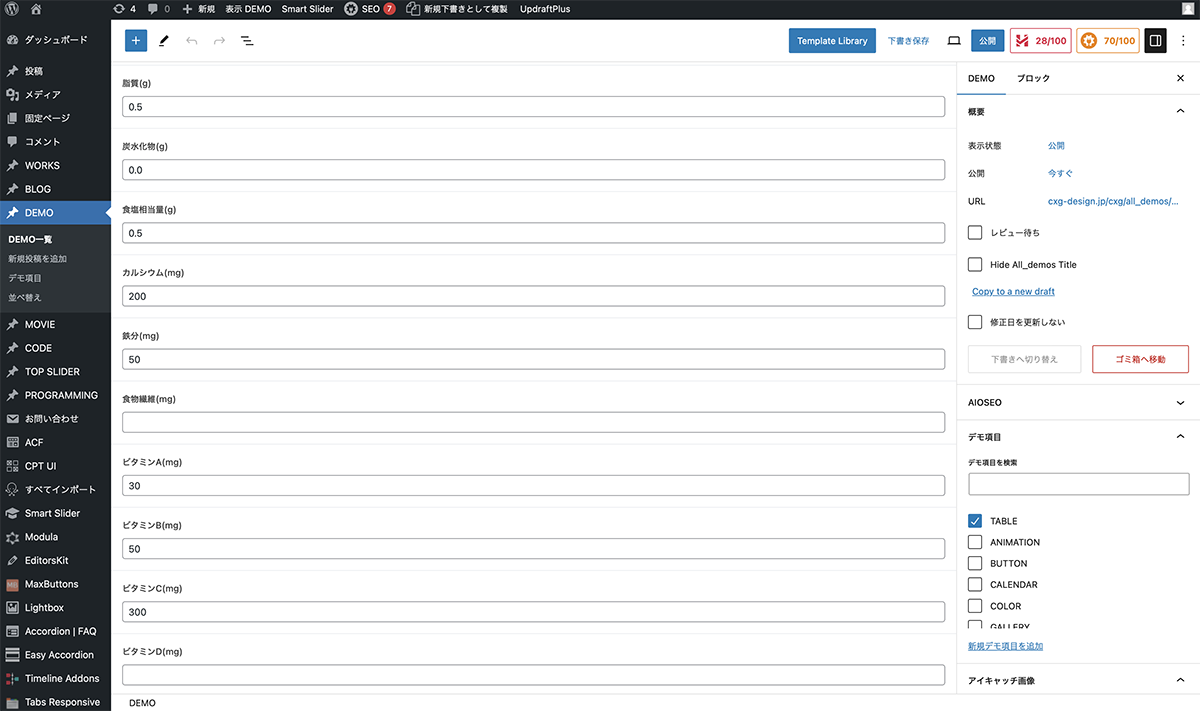
食物繊維、ビタミンCを非表示にするため空欄に
以上で、今回の説明は終了です。項目と場所が決まっていれば、テキストのみでテーブルを作成することもできます。