ACFのテキスト、テーブルで、増減可能なタブメニューを作成
以前のBLOGで、タブは、Tabs Responsiveというプラグインで作成できることを紹介しました。今回は、ACFのテキスト、テーブルを使用して、増減可能なタブメニューを作成します。

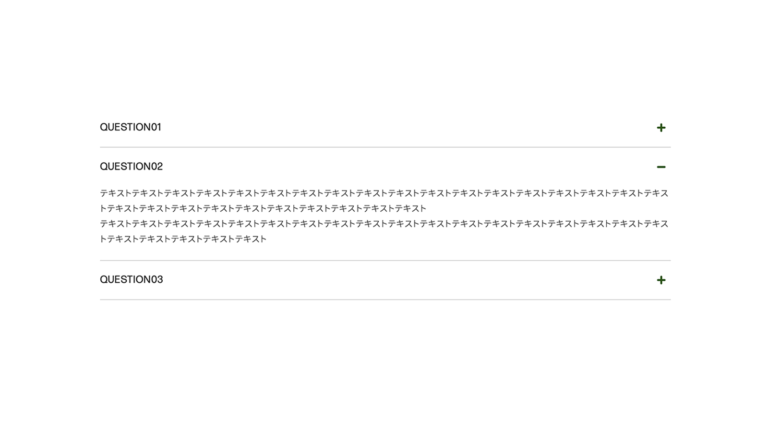
今回のDEMOは、LUNCH、DRINK、DINNERのメニューを切り替えできるタブを作成しました。

タブメニュー名をテキスト、メニューをテーブルで作成しました。タブメニュー名を入力しない場合、タブは表示されません。
ACF設定
メニュー名3つ、テーブル3つ、計6つのフィールドを作成します。
まず、タブメニューを作成します。フィールドタイプは、テキストです。フィールドラベルに、編集画面で表示する名前、フィールド名にPHPに入力する名前を設定します。

フィールドタイプは、テキスト
| 設定項目 | 設定値 |
|---|---|
| フィールドタイプ | テキスト |
| フィールドラベル | タブ01 |
| フィールド名 | add_tab01 |
| 初期値 | 空欄 |
次に、テーブルの設定をします。フィールドタイプを、Tableに設定します。フィールドラベルに、編集画面で表示する名前、フィールド名にPHPに入力する名前を設定します。Table Header、Table Captionは使用しないので、Noに設定します。

フィールドタイプを、Tableに設定
| 設定項目 | 設定値 |
|---|---|
| フィールドタイプ | Table |
| フィールドラベル | メニューテーブル01 |
| フィールド名 | add_menutable01 |
| Table Header | No |
| Table Caption | No |
それぞれ、残りの2つのフィールドを同じように作成します。これでACF設定は終了です。

それぞれ、残りの2つのフィールドを同じように作成
コード
シングルページのループ内に下記コードを挿入します。
<div class="acftab_wrapper">
  	<ul class="acftab ">
		<?php if (get_field('add_tab01')): ?>
  			<li class="tabactive">
				<a href="#tab001">
					<?php the_field('add_tab01'); ?>
				</a>
			</li>
		<?php endif; ?>
  		<?php if (get_field('add_tab02')): ?>
  			<li>
				<a href="#tab002">
					<?php the_field('add_tab02'); ?>
				</a>
			</li>
		<?php endif; ?>
  		<?php if (get_field('add_tab03')): ?>
  			<li>
				<a href="#tab003">
					<?php the_field('add_tab03'); ?>
				</a>
			</li>
		<?php endif; ?>
  	</ul>
</div>
<div class="tabarea_wrapper">
	<div class="tabarea">
		<?php if (get_field('add_tab01')): ?>
  			<div id="tab001" class="area is-active">
  				<h3><?php the_field('add_tab01'); ?></h3>
  				<?php
					$table = get_field( 'add_menutable01' );
					if ( ! empty ( $table ) ) {
						echo '<div class="acftab_table"><table border="0">';
 						if ( ! empty( $table['caption'] ) ) {
							echo '<caption>' . $table['caption'] . '</caption>';
 						}
						if ( ! empty( $table['header'] ) ) {
 							echo '<thead>';
							echo '<tr>';
 							foreach ( $table['header'] as $th ) {
 								echo '<th>';
        						echo $th['c'];
        						echo '</th>';
      						}
      						echo '</tr>';
    						echo '</thead>';
  						}
  						echo '<tbody>';
    					foreach ( $table['body'] as $tr ) {
    	    				echo '<tr>';
      						foreach ( $tr as $td ) {
      							echo '<td>';
        						echo $td['c'];
        						echo '</td>';
      						}
      						echo '</tr>';
    					}
    					echo '</tbody>';
  						echo '</table></div>';
					}
				?>
  			</div>
		<?php endif; ?>
		<?php if (get_field('add_tab02')): ?>
  			<div id="tab002" class="area is-active">
  				<h3><?php the_field('add_tab02'); ?></h3>
  				<?php
					$table = get_field( 'add_menutable02' );
					if ( ! empty ( $table ) ) {
						echo '<div class="acftab_table"><table border="0">';
 						if ( ! empty( $table['caption'] ) ) {
							echo '<caption>' . $table['caption'] . '</caption>';
 						}
						if ( ! empty( $table['header'] ) ) {
 							echo '<thead>';
							echo '<tr>';
 							foreach ( $table['header'] as $th ) {
 								echo '<th>';
        						echo $th['c'];
        						echo '</th>';
      						}
      						echo '</tr>';
    						echo '</thead>';
  						}
  						echo '<tbody>';
    					foreach ( $table['body'] as $tr ) {
    	    				echo '<tr>';
      						foreach ( $tr as $td ) {
      							echo '<td>';
        						echo $td['c'];
        						echo '</td>';
      						}
      						echo '</tr>';
    					}
    					echo '</tbody>';
  						echo '</table></div>';
					}
				?>
  			</div>
		<?php endif; ?>
		<?php if (get_field('add_tab03')): ?>
  			<div id="tab003" class="area is-active">
  				<h3><?php the_field('add_tab03'); ?></h3>
  				<?php
					$table = get_field( 'add_menutable03' );
					if ( ! empty ( $table ) ) {
						echo '<div class="acftab_table"><table border="0">';
 						if ( ! empty( $table['caption'] ) ) {
							echo '<caption>' . $table['caption'] . '</caption>';
 						}
						if ( ! empty( $table['header'] ) ) {
 							echo '<thead>';
							echo '<tr>';
 							foreach ( $table['header'] as $th ) {
 								echo '<th>';
        						echo $th['c'];
        						echo '</th>';
      						}
      						echo '</tr>';
    						echo '</thead>';
  						}
  						echo '<tbody>';
    					foreach ( $table['body'] as $tr ) {
    	    				echo '<tr>';
      						foreach ( $tr as $td ) {
      							echo '<td>';
        						echo $td['c'];
        						echo '</td>';
      						}
      						echo '</tr>';
    					}
    					echo '</tbody>';
  						echo '</table></div>';
					}
				?>
  			</div>
		<?php endif; ?>
	</div>
</div>jQueryを読み込み、下記コードをJavaScriptファイルを作成し、記入します。
function GethashID (hashIDName){
  if(hashIDName){
    $('.acftab li').find('a').each(function() {
      var idName = $(this).attr('href');
      if(idName == hashIDName){
        var parentElm = $(this).parent();
        $('.acftab li').removeClass("tabactive");
        $(parentElm).addClass("tabactive");
        $(".area").removeClass("is-active");
        $(hashIDName).addClass("is-active");
      }
    });
  }
}

$('.acftab a').on('click', function() {
  var idName = $(this).attr('href');
  GethashID (idName);
  return false;
});

$(window).on('load', function () {
    $('.acftab li:first-of-type').addClass("tabactive");
    $('.area:first-of-type').addClass("is-active");
  var hashName = location.hash;
  GethashID (hashName);
});CSSでスタイルを整えます。
/*タブ*/

.acftab{
	display: flex;
	flex-wrap: wrap;
	background: #fff;
	max-width: 1250px;
	margin: auto;
}

.acftab li a{
	display: block;
	font-weight: 400;
	padding:10px 20px;
}

.acftab li.tabactive a{
	border-bottom: solid #000 4px;
}

.tabarea_wrapper{
	background: linear-gradient(to bottom, #bbb 0px, #ddd 10px);
}

.tabarea{
	max-width:1250px;
	margin: auto;
}

.area {
  display: none;
  opacity: 0;
  padding: 50px 0;
}

.area.is-active {
    display: block;
    animation-name: displayAnime;
    animation-duration: 2s;
    animation-fill-mode: forwards;
}

.acftab_wrapper{
	width: 100%;
	margin: auto;
    background: #fefefe;
	padding-top: 7em;
}

.area h3{
  font-size: 1.3rem;
 padding: 0.5em 20px 0.3em;
}

.area li{
  padding: 10px 0;
  border-bottom: 1px solid #ddd;
}

@keyframes displayAnime{
  from {
    opacity: 0;
  }
  to {
    opacity: 1;
  }
}

/*テーブル */

.acftab_table{
	margin: auto;
	overflow-x: scroll;
	padding: 3em 0;
}

.acftab_table th,td {
	padding: 0.7em;
	vertical-align: middle;
}

.acftab_table table {
    border-collapse:  collapse; /* セルの線を重ねる */
    width:  100%;
}


.acftab_table tbody tr :first-child {
	font-weight: 400;
}

.acftab_table tbody tr :last-child {
	border-right: none;
	text-align: right;
}

.acftab_table tbody td {
    text-align: left;
}

.acftab_table tbody tr:nth-child(odd){
   	background: #eee;
}

.acftab_table td{
	padding: 1em 20px ;
}

@media screen and (min-width: 1250px) {

	.acftab_wrapper{
		padding: 7em 10% 0 10%;
	}

	.tabarea_wrapper{
		padding: 0 10%;
	}

	.area h3{
  		padding: 0.5em 0 0;
	}

}
設置
タブ01〜03のテキスト欄に、タブメニュー名を入力します。メニューテーブル01〜03に横2列のテーブルをそれぞれ作成します。これで完成です。

テキスト欄に、タブメニュー名を入力

横2列のテーブルをそれぞれ作成
今回のDEMOでは、メニューに全て入力しましたが、タブ03を空欄にすると、タブが2つのみ表示されます。

タブ03を空欄にすると

タブが2つのみ表示
以上で、今回の説明は終了です。タブをテキスト入力のみで作成できるのは便利ですね。ACFだと、編集画面のみで作成できるので、プラグインを使用するよりは簡単です。テンプレートで、指定の場所に設置する場合はACFがオススメです。